

Introduction
This blog serves as a comprehensive guide and resource for using Ansible to automate security updates in order to fix vulnerabilities found from Nessus Essentials scans. I’ll walk you through the intricacies of configuring Nessus Essentials for credentialed vulnerability scans against Windows Hosts and the magic of Ansible in automating the remediation process.
Features
- Credentialed Scans: Learn how to configure and execute credentialed scans using Nessus Essentials, gaining deeper insights into your system’s security posture.
- Vulnerability Detection: Understand how Nessus identifies vulnerabilities, providing detailed reports on potential security risks within your environment.
- Remediation Strategies: Explore best practices and step-by-step guides for addressing vulnerabilities discovered during Nessus scans, ensuring a more secure infrastructure.
Languages, Environments and Utilities Used
- Tennable Nessus Essentials
- Windows 10
- Virtual Machine
- Kali Linux
- Ansible
- OpenSSH
Walkthrough
Part 1 – Configure Nessus Essentials
-
Download Nessus Essentials: Visit the Tenable website and download Nessus Essentials: https://www.tenable.com/products/nessus/nessus-essentials
-
Install Nessus: Follow the installation instructions for your specific operating system.
-
Access Nessus Web Interface: Once installed, access Nessus via a web browser by navigating to
https://localhost:8834or the specified port during installation. -
Configure Nessus: Set up Nessus by creating a user account, configuring network settings, and activating your Nessus Essentials license.

Part 2: Configure Credentialed Scans
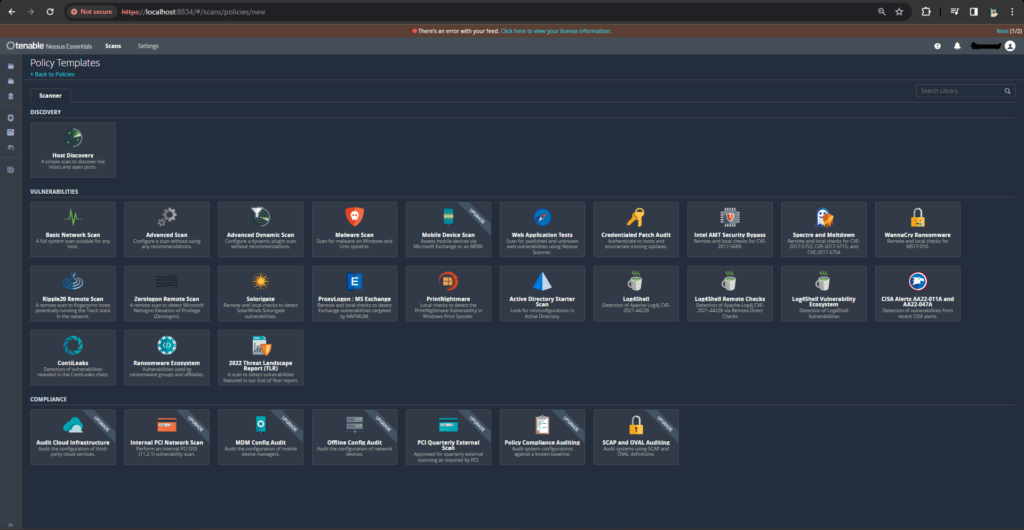
1. Create a New Policy:
- Navigate to the “Policies” tab.
- Click on “New Policy” and configure a policy suitable for credentialed scans against Windows Hosts.
- (This example will use the basic network scan)
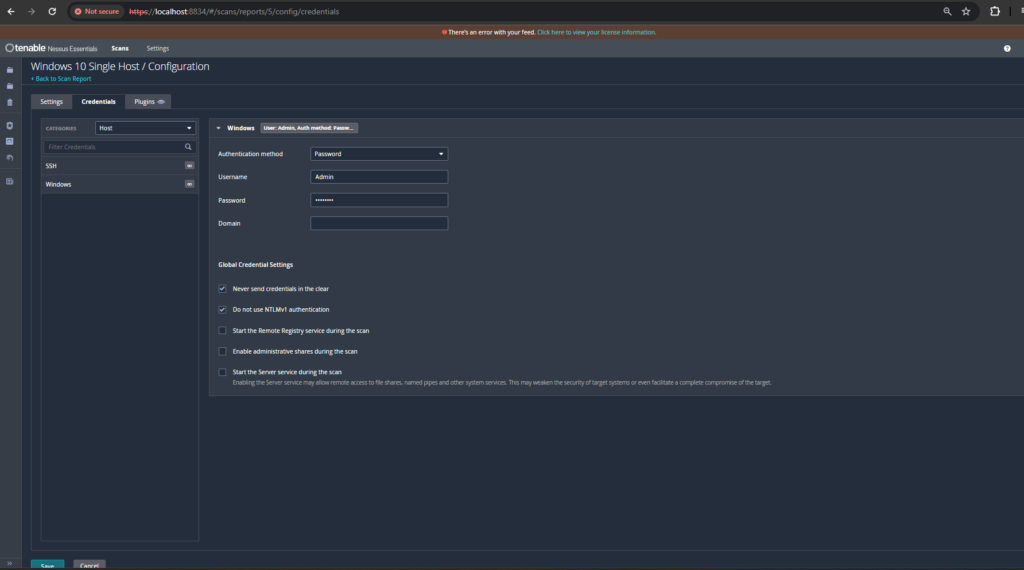
2. Configure Windows Credentials:
- In the policy settings, specify Windows credentials with sufficient permissions for scanning.
3. Create a New Scan:
- Go to the “Scans” tab and click on “New Scan.”
- Choose the policy you created and define the target hosts for the scan.
4. Run the Scan:
- Initiate the scan and monitor the results for identified vulnerabilities.
Part 3: Ansible Setup
1. Install Ansible:
-
- Install Ansible on your control machine. Depending on your operating system, you can use package managers like
apt,yum, orbrew.
- Install Ansible on your control machine. Depending on your operating system, you can use package managers like
# Example for Ubuntu / Debian
sudo apt update
sudo apt install ansible
2. Create Ansible Playbooks:
- Craft YAML playbooks to automate remediation tasks. These playbooks will include tasks for addressing vulnerabilities identified by Nessus.
3. Utilize PowerShell and CMD in Playbooks:
- Incorporate PowerShell scripts or Windows Commands within Ansible playbooks to execute remediation actions on Windows hosts.
Part 3 (Continued in More Detail): Configure OpenSSH for Ansible
Depending on which connection method you use (WinRM or OpenSSH), you will need to take different steps. In this guide, we’ll focus on using OpenSSH.
1. Install OpenSSH on Windows Hosts:
- Ensure that OpenSSH is installed on your Windows hosts. Starting with Windows Server 2019 and Windows 10, OpenSSH is included as a feature that can be installed.
Powershell

# Install OpenSSH Server
Install-WindowsFeature -Name OpenSSH.Server -IncludeManagementTools

2. Start the OpenSSH Server:
- Start the OpenSSH server on the Windows hosts.
# Start the OpenSSH Server
Start-Service sshd
3. Configure OpenSSH Service:
- Optionally, you can configure the OpenSSH server to start automatically and set it to start with each boot.
# Set OpenSSH service to start automatically
Set-Service -Name sshd -StartupType 'Automatic'
4. Configure Firewall Rules:
- Ensure that the firewall allows traffic on the SSH port (default is 22). You can use PowerShell to open the necessary port.
# Open SSH port in Windows Firewall
New-NetFirewallRule -Name sshd -DisplayName 'OpenSSH Server (sshd)' -Enabled True -Direction Inbound -Protocol TCP -Action Allow -LocalPort 22

5. Generate SSH Key Pair:
- On your Ansible control machine, generate an SSH key pair if you don’t have one already.
# Generate SSH key pair
ssh-keygen -t rsa -b 2048 -f ~/.ssh/id_rsa
6. Copy SSH Public Key to Windows Hosts:
- Copy the SSH public key (
id_rsa.pub) from the Ansible control machine to the Windows hosts.
# Example: Using ssh-copy-id
ssh-copy-id username@windows_host
Alternatively, you can manually add the public key to the authorized_keys file on the Windows host.
Part 3 (Continued in More Detail): Ansible Setup
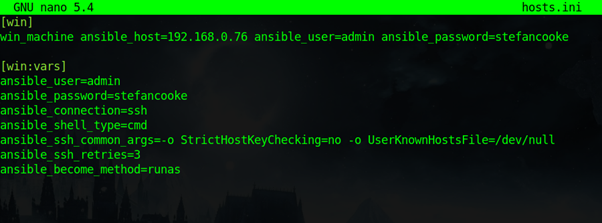
1. Configure Ansible Inventory/Hosts:
- Update your Ansible inventory file to include the Windows hosts and specify the connection method as
ssh.
- This is the configuration file for the host servers which are the Windows servers, if there are multiple this would be updated and there would be more IP addresses. Ansible uses these variables to login to the Windows system. The password variable is in clear-text which is a vulnerability, it is a better idea to use SSH key-pair with public and private keys to access the server, but for simplicity passwords are presented to Ansible:
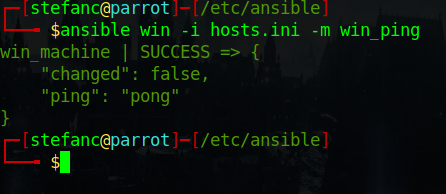
2. Test Connectivity:
Test connectivity and make sure you are able to access the system via SSH through using the win_ping command:
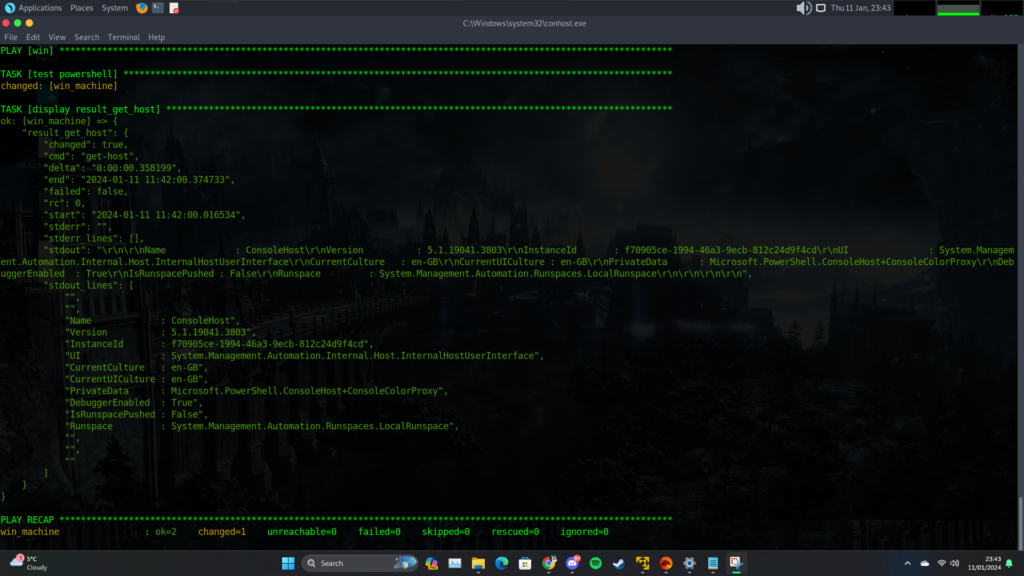
3. Create and Run Test Playbook:
Run by typing in
ansible-playbook -i <your hosts/inventory file> <name of test playbook>

my example
ansible-playbook -i hosts.ini ssh_win.yml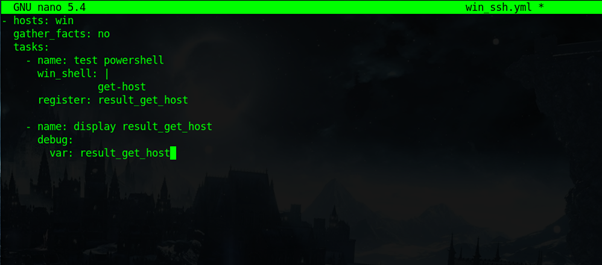
4. Update Ansible Playbooks:
- Modify your Ansible playbooks to use the
win_updatesmodule for tasks on Windows hosts. Ensure that your playbooks are adapted to work seamlessly with the OpenSSH connection method.

Now, your Ansible setup is configured to use OpenSSH for communication with Windows hosts. Adjustments in your playbooks and inventory ensure a smooth and secure connection, contributing to a seamless Automated Vulnerability Management process.
Part 4: Execute Automated Remediation
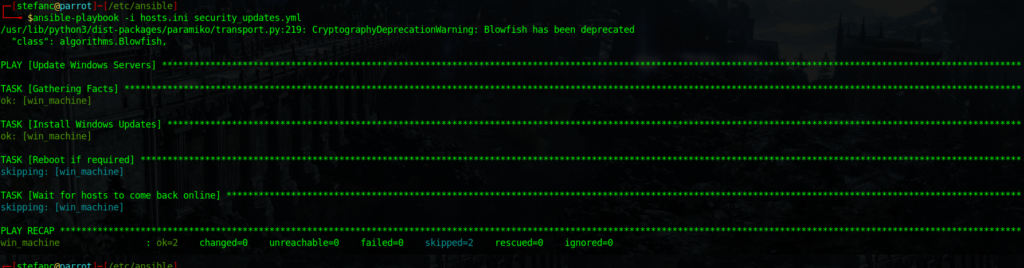
- Run Ansible Playbooks:
- Execute Ansible playbooks to automate the remediation process. This could involve applying Windows updates, configuring security settings, or any other tasks necessary to address vulnerabilities.
- Monitor Results:
- Regularly check Nessus for subsequent scans to ensure that vulnerabilities are being successfully remediated.
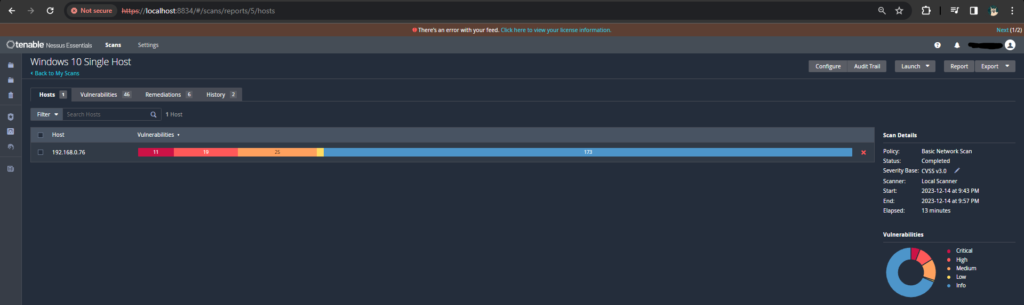
Following the execution of Ansible playbooks, the subsequent network scan displayed a remarkable improvement in the cybersecurity posture. The number of vulnerabilities originating from outdated software witnessed a significant reduction. Specifically, the critical vulnerabilities, high-risk issues, and a majority of medium-level concerns were successfully mitigated. The initial network scan revealed 11 critical vulnerabilities, 19 high, and 25 medium issues. Through the deployment of Ansible playbooks, this number has drastically decreased, leaving only one remaining medium-level vulnerability highlighting the effectiveness of Ansible in addressing the majority of the initial concerns. This outcome not only indicates a substantial reduction in potential security threats but also underscores the efficiency of automated processes in enhancing the overall security posture.

Conclusion
The successful reduction of vulnerabilities in this scenario exemplifies the power of automation in cyber security. Ansible’s role in orchestrating systematic responses to security issues has proven to be a game-changer. As organizations strive to fortify their defenses in an ever-evolving threat landscape, leveraging automation tools like Ansible emerges as a strategic imperative. Through this comparative analysis, we’ve witnessed the tangible impact of Ansible in transforming a network’s security posture, demonstrating the potential for enhanced resilience and protection against cyber security threats.
By following these steps, you can establish a robust Automated Vulnerability Management system using Nessus Essentials and Ansible. Regularly updating and refining your setup will ensure a proactive approach to cyber security, enhancing the overall security posture of your digital environment.